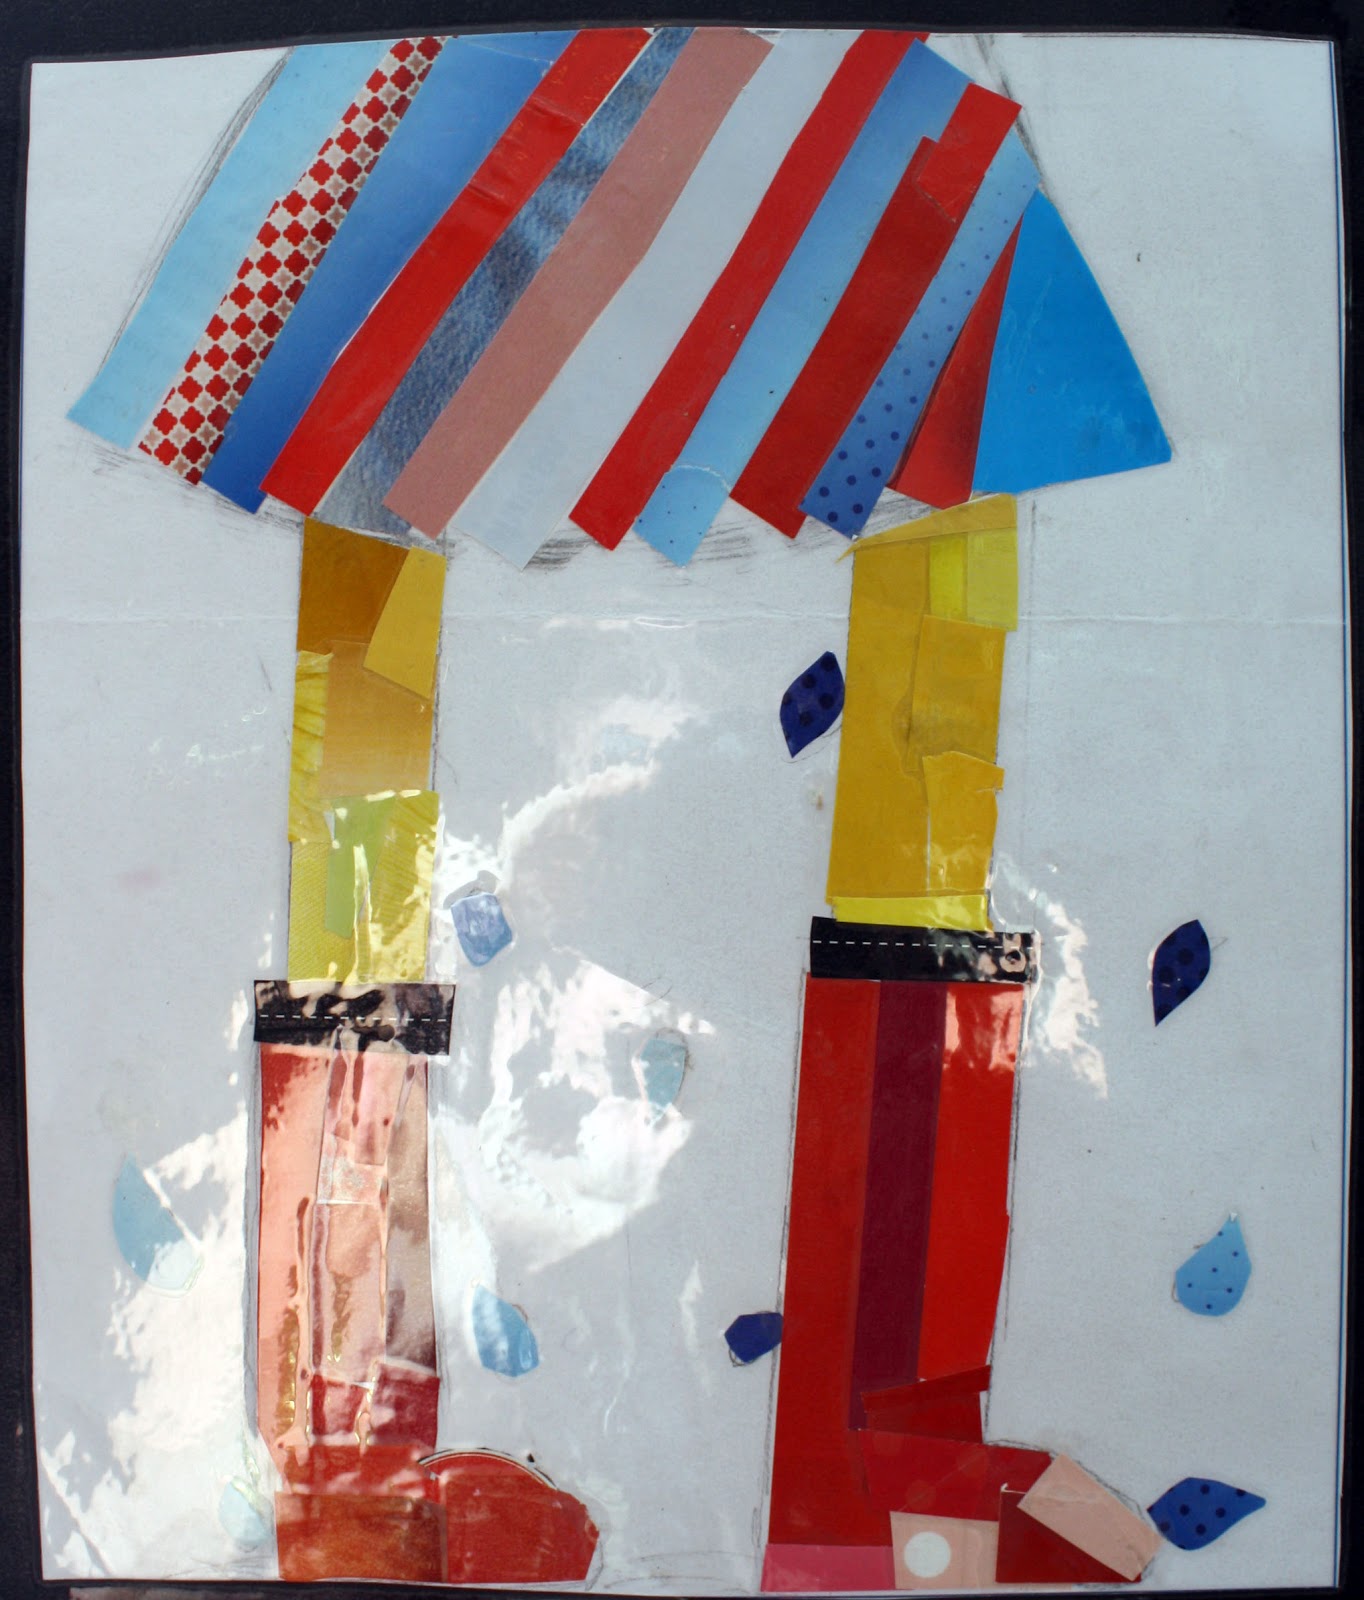
As always, I can't put names on the students work for school privacy reasons.
Showing posts with label art lessons. Show all posts
20 March 2013
Primary Colour Collages
My year 7 art class made these primary colour collages a few weeks ago. I forgot to photograph them before being laminated a stapled to a display board. As a result, the photos have reflections on them and are very oddly cropped. Hopefully you can still get an idea of the great work the students did.
As always, I can't put names on the students work for school privacy reasons.
Labels:
art,
art lessons,
collage,
colour,
colour theory,
lesson ideas,
paper,
year 7 art
14 March 2013
year 7 Asian artwork
Some of my year 7 art class have just finished their small Asian style canvases.
Students had to complete their work in several steps. They first had to complete colour theory exercises so that they would understand the results of mixing colours.
They then learnt to dye paper using orizomegami (similar to origami but involves dying the paper). They then had to draw a range of paper lanterns from real life. The next step was to draw a branch (we had some very creative interpretations of the branches provided) on their dyed paper and add their images of hanging paper lanterns. Finally, we stretched their paper around a small canvas.
It was wonderful watching the girls dyeing their paper, one of them even had a 'lightbulb' moment. Whilst dipping her paper in the dyes she looked at me and said, 'we learnt colour theory so we would know what dye colours would mix well together didn't we'. It was a relief to know that some of what I teach them actually makes sense to them.
The girls who had finished were so pleased with their work that they begged me to take them home. I agreed they could take them home only if they took a photo of their work and sent me a copy. The photos below were taken by the girls on their ipads.
Students had to complete their work in several steps. They first had to complete colour theory exercises so that they would understand the results of mixing colours.
They then learnt to dye paper using orizomegami (similar to origami but involves dying the paper). They then had to draw a range of paper lanterns from real life. The next step was to draw a branch (we had some very creative interpretations of the branches provided) on their dyed paper and add their images of hanging paper lanterns. Finally, we stretched their paper around a small canvas.
It was wonderful watching the girls dyeing their paper, one of them even had a 'lightbulb' moment. Whilst dipping her paper in the dyes she looked at me and said, 'we learnt colour theory so we would know what dye colours would mix well together didn't we'. It was a relief to know that some of what I teach them actually makes sense to them.
The girls who had finished were so pleased with their work that they begged me to take them home. I agreed they could take them home only if they took a photo of their work and sent me a copy. The photos below were taken by the girls on their ipads.
Labels:
art,
art lessons,
colour theory
06 March 2013
Yr 9 Colour Wheels
My year 9 art class are just finishing off their colour colours. Below are a few photos of the ones I have received so far.
This first one is fantastic. It is sliced up pencils, crayons and an assortment of beads, etc.
Bit hard to see on here but the yellow section above has little tiny chickens on it.
All the flowers were cut with a stamp type thing out of the different coloured
papers and then all assembled.
Labels:
art,
art lessons,
colour,
colour theory,
colour wheel,
lesson ideas,
pencil,
teaching
05 March 2013
Papermaking workshop photos continued...
In my last post I shared some photos from a papermaking workshop I held several years ago. The last post showed the equipment, some of the pulps, etc. This post shows some of the examples of the actual work produced by the students.
I still can't believe it has taken me nearly 2 years to be able to find these photos.
Labels:
art,
art lessons,
handmade paper,
paper,
Southern Textiles,
teaching
Papermaking workshop photos
I just found some photos from a papermaking workshop I ran a few years ago. I had always planned to publish them on here but when my computer died a few years earlier I thought I had lost them. I just found a copy on an old portable hard drive. It reminds me of the importance of backing up your work. I will post a whole pile of the photos (yes I'm biased) but I think there are some really great ones.
I haven't taught papermaking since this last workshop as there is a huge amount of preparation needed. Maybe one day I'll teach another one.
The photos shown were a 4 day workshop that included a whole range of papermaking techniques.
I haven't taught papermaking since this last workshop as there is a huge amount of preparation needed. Maybe one day I'll teach another one.
The photos shown were a 4 day workshop that included a whole range of papermaking techniques.
Some of the equipment for the day
Some of the additional plant products I provided for adding to the paper pulp
The room setup with vats everywhere.
Tubs of cross shredded paper waiting to be processed.
White paper pulp with dye squirted on top- yet to be mixed
Some of the many sheets drying.
Labels:
art,
art lessons,
dye,
handmade paper,
paper,
Southern Textiles,
teaching
03 March 2013
More complementary colour photographs
Labels:
art,
art lessons,
colour theory,
lesson ideas,
photo,
photography
02 March 2013
Yr 8 colour theory
My year 8 art class have started the year by completing a 'complementary colour' task. The requirement was for students to take 3 photographs that each contain the complementary colours. Students were instructed to be as creative as possible. Below are some of the examples they created.
The one above is my favourite.
Labels:
art,
art lessons,
colour theory,
lesson ideas,
photo,
photography
01 March 2013
2013 teaching units
We are already well into 2013 and I haven't had a chance to explain on here the different units I am teaching.
I'm teaching year 7-10 art and all classes have an 'Asian' focus for the year. This was my choice as it tends to be a favourite theme of mine and it is also part of the new National Curriculum.
All year levels start with a basic colour theory unit and are then undertaking the projects below.
Year 7 art-
paper 3d lanterns
drawings of lanterns on a dyed paper background
Year 8 art-
watercolour and pen patterned zodiac animals
collaged canvases with chinese paper-cuts over the top
Year 9 art-
paper mache peacocks
asian stationery design
Year 10 art-
Watercolour with pen and ink images based on an asian theme
free choice 'asian' influenced piece of art/design.
The students all seem to really be enjoying their projects so far- fingers crossed that this continues.
I'm teaching year 7-10 art and all classes have an 'Asian' focus for the year. This was my choice as it tends to be a favourite theme of mine and it is also part of the new National Curriculum.
All year levels start with a basic colour theory unit and are then undertaking the projects below.
Year 7 art-
paper 3d lanterns
drawings of lanterns on a dyed paper background
Year 8 art-
watercolour and pen patterned zodiac animals
collaged canvases with chinese paper-cuts over the top
Year 9 art-
paper mache peacocks
asian stationery design
Year 10 art-
Watercolour with pen and ink images based on an asian theme
free choice 'asian' influenced piece of art/design.
The students all seem to really be enjoying their projects so far- fingers crossed that this continues.
Labels:
art lessons,
student artwork
26 November 2012
Making a painted collage
When I teach new classes I often make a sample piece of work so that the students have a sort of guide to look at. I sometimes make the pieces along side the students, just one step ahead at a time. Other times I will make the whole artwork prior to starting teaching the lessons.
The artwork below relates to the student artwork in my previous post. The class started off by doing blind contour drawings and continuous line drawings of teapots and teacups. Realistic drawing was then taught next. A lesson on composition followed the drawing so that students could decide on an image for their final work.
I realised that I don't have the photos of all the steps for this work unfortunately. Below are the only photos I could find.
The artwork below relates to the student artwork in my previous post. The class started off by doing blind contour drawings and continuous line drawings of teapots and teacups. Realistic drawing was then taught next. A lesson on composition followed the drawing so that students could decide on an image for their final work.
I realised that I don't have the photos of all the steps for this work unfortunately. Below are the only photos I could find.
Above is the initial collage.
Above Image: As I didn't want to paint over the collage (so students could still view the first parts) I photocopied it before adding paint. Sorry about the reflection from the flash.
The image above has now had some black pen added to show shadows and the start of some detail. The shadows have come out darker in the photo than the actual work. If I wasn't so tired I would have gone to good old Photoshop.
Labels:
art,
art lessons,
collage,
concept development,
drawing,
lesson ideas,
tea cup,
tea pot,
teaching,
teacup,
teapot
25 November 2012
Teacup and teapot collages
A few weeks ago my gorgeous Year 9 girls finished off their teacup/teapot collages. The year 9's were also working on the Alice in Wonderland idea of the mad hatters tea party.
The class started off by doing blind contour and continuous line drawings of teacups and teapots. We then moved on to learning about realistic drawing of teacups and teapots. Students then worked out a composition they liked and set about collaging on top of their drawing. Paints were then applied and black pen for final details. Some of the results are below. I will post detailed step by step photos of the process in a future post.
I love the one above for its creativity.
I know I shouldn't have favourites but the one above is absolutely divine.
Labels:
alice in wonderland,
art,
art lessons,
collage,
drawing,
lesson ideas,
paint,
paper,
pen and ink,
student artwork,
tea,
tea cup,
tea pot,
teaching,
teacup,
teapot
12 November 2012
Tea cup and teapot drawings and paintings
Below are some year 8 artworks based on the same principles as listed in my previous post. The main difference is that these students chose to work in colour using watercolour paint.
Labels:
alice in wonderland,
art,
art lessons,
paint,
pen and ink,
student artwork,
tea,
tea cup,
tea pot,
teaching,
teacup,
teapot
Subscribe to:
Posts (Atom)